Sunday, August 28, 2011

XAML Magic - Few of the Basic Features..

The basic idea of XAML is to make UI design more generic and provide environment to work both developers and UI designers separately. Finally it’s ended up in XML structure, where everyone can understand the stuff very easily.

Just let me list down few of the main features that are coming with XAML,

1. Whatever you do in XAML, you can do the same with code as well

It’s like this, Here is the XAML Code,


Same thing you can do with the code too,

   
In XAML, Elements/Tags are representing the classes and the XML tag attributes are representing the class properties. This you alreay have seen in above XAML code and as an example,
"Margin="20">Welcome to the World of XAML"
Margin is a property of TextBlock class and that you can see as attribute of  tag. 
2.       Represent Properties as Elements
This is one of the interesting feature that you can find in XAML and it is looks like this,
Normally what you do is that you specify the content of the button directly as a text, but here you can take button content as anything that you can imagine as a UI control. In example it is a Image, but you can something different.
3.       Implicit Type Conversion 
This is about converting the types at runtime and for an example,


Border is the class that has property, which accepts “System.Windows.Media.Brushes.Blue” object as its value. In addition to that BorderThicknss also a property and which is accepting the Thickness Object as its value. 
4.       Markup Extensions 
This is about .NET attributes and where you can place them in XAML structure.  There are number of built in Markup extensions and in addition to that you can develop custom markup extensions by your own. 
These are the built in markup extensions you can find in .NET,
  • Binding
    To bind the values of two properties together.
  • StaticResource
    One time lookup of a resource entry
  • DynamicResource
    Auto updating lookup of a resource entry
  • TemplateBinding
    To bind a property of a control template to a dependency property of the control
  • x:Static
    Resolve the value of a static property.
  • x:Null
    Return
    null

Example,


5. Finally, Namespaces

Normally namespaces we used to find in .cs or .vb files in .NET (in most if the times), but this time you will have to invoke them in XAML, because, in XAML you are dealing with the objects, which are already defined for you some where by Microsoft or you or any other.

To invoke a relevant class tag in a XAML, you have to import them first into XAML document. In default you will get imported basic namespaces, into you XAML document by Visual Studio, when you working with it. Basic namespaces you will find in WPF applciations,

http://schemas.microsoft.com/winfx/2006/xaml/presentation - It is mapped to all wpf controls inSystem.Windows.Controls.

http://schemas.microsoft.com/winfx/2006/xaml - it is mapped to System.Windows.Markup that defines the XAML keywords.

Here is how it’s look like in XAML,

If you any custom controls developed in an Assembly called “Project.CustomControls”, here is the how we can import it into XAML document,

xmlns=”http://schemas.microsoft.com/winfx/2006/xaml/presentation”
        xmlns:x=”http://schemas.microsoft.com/winfx/2006/xaml”
        xmlns:myCustomControls ="clr-namespace:Project.CustomControls">
Cheers
Lakmal Kankanamge 

XAML Magic - Building Applications with XAML Toyes

Karl Shifflett,one of the best techi on XAML and WPF stuff has managed to introduce new toolkit, which is providing capabilities to create UI forms directly from classes that you have written already. Simply it looks amazing, because without writing any line of code, on purpose making the UI Logic, you can make a make form and have all the data bind to it.

Karl call this as XAML Power Toyes, that you can download and find more information about it from his blog.

This is the videos I found this stuff first..

http://channel9.msdn.com/shows/Continuum/XAMLPowerToys/

Lakmal Kankanamage

XAML Magic..

I wanted to open a topic like this because of the beauty I found in XAML technology. In early days I was struggling to find out how we can work with XAML, since it was fresh experience for .NET developers.

XAML is about coming UI into XML structure. XAML is totally based on the XML concepts and it is about make things more generic at the level of the UI designing.

Channel 9 has bunch of videos, specially about XAML, it's architecture, features and etc.. Out of them I found this video is so much useful in understanding the concept behind the XAML technology ...


This is just a start of discussion about XAML technology and there will more post coming on this in future...

Lakmal Kankanamge


Saturday, August 20, 2011

Microsoft Surface Programming – Object Recognition

Microsoft Surface Technology is supporting recognizing physical objects through the surface and reacting according to the object placed on the surface. I was so curios to know about the concept behind this object recognizing with this Microsoft Surface enable applications.

With the things I leaned from Colombo Code Camp and after having searched on the internet, found few important key points attached with technology. First thing is, MS Surface is recognizing object as a Tag, which has a unique value, which is retrieved from Surface’s Vision system. Means for MS Surface Vision System, physical object is always a Tag, which always has to be pasted on the object, as surface can identify it properly.

Tags are looks like this,

Tag always has value and each value is having different dot structured as showed in the picture. After having this tag printed in a piece paper, you have to paste it on the object that you are going to place on the Surface table (or any other device which is supporting MS Surface Technology). Then that object has the value that the pasted tag has, in the surface application.

Then the next curious point is that how we can generate these tags for Surface Applications. Answer is, we have two ways obtaining these tags,

  1. Generate Tag with Tag Printing Tool
  2. 2. Tags from Microsoft.

Please refer this link for more information - http://msdn.microsoft.com/en-us/library/ee804762(v=surface.10).aspx

Once you have the tag, you can paste it on any object, then that object should be identified by a MS Surface application by the Tag which is pasted on it.

Input Visualizer and Input Simulator

There is a tool which has been delivered with Windows 7 called “Input Visualizer” and this tool can be used to show some information about the tags (objects) which are placed on surface applications. To open it - All Programs | Microsoft Surface 2.0 SDK | Tools | Input Visualizer.

And for this we need to open one more tool, Input Simulator, which I explained in my previous post in MS Surface Scatter View.

Input Visualizer

Input Simulator

How we can identify the Tags programmatically

Just start get things going, open Visual Studio 2010 and create a MS Surface Project called “MyObjectRecognizionApp”,

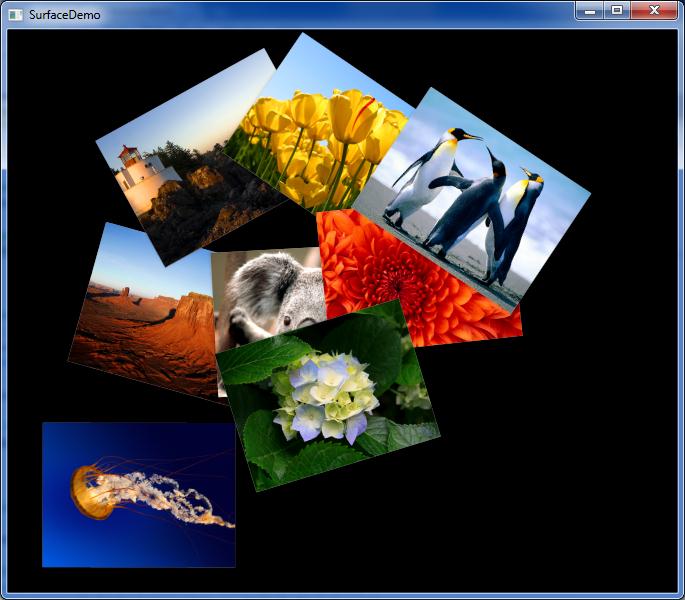
Without writing any line of codes, you can start place objects on surface application and see how their tag information is looks like,

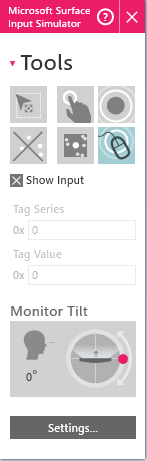
Just click on the middle box of second row of tools in Input Simulator, then click upon the application surface, then you will see this kind of picture in your screen. All this you have to do because of we are testing these surface application features with our monitors which are not supporting the touch. If you seriously check the value in the detail view, you will find it like, 0x0000000000000100 and double check it with the values that I have mentioned in Tag Value field in Input Simulator.

This is how you can test surface application for object recognition with the Input Simulator, provided with Windows 7 Operating System. Before clicking on the Surface application, you can mention tag values (Tag Series and Tag Value) and those values you can use in your app code for responds for virtual objects that you test with input simulator.

So our next step is to recognize an object (In our case it is virtual object which we make with input simulator) place on the surface application and do something to respond for it. For this we need to know about two most important XAML Elements,

1. TagVisualizer – This will display the information about the tag when it is placed in the Surface. The TagVisualizer works with a known set of tags. This known set is defined in the TagVisualizer.Definitions collection.

2. TagVisualization – This is the control type which holds all the content, after particular object is placed on the surface application.

Here what I’m going to show is, I will have two virtual objects which will have tag values 100 and 200 respectively. Once first object is place on the Surface Application, system will show “My Tag1” text and for the second object it will show “My Tag 2” text.

In my project I have default window created, named “SurfaceWindow1.xaml” and I will go with it without create any new windows. This is how it’s look like SurfaceWindow1 XAML code,

<s:TagVisualizer x:Name="TagVisualizer1">

<s:TagVisualizer.Definitions>

<s:TagVisualizationDefinition

Series="0"

Value="100"

Source="MyTag1Visualization.xaml"

LostTagTimeout="2000"

OrientationOffsetFromTag="0"

PhysicalCenterOffsetFromTag="0,-1.5"

UsesTagOrientation="True"

TagRemovedBehavior="Fade" />

<s:TagVisualizationDefinition

Series="0"

Value="200"

Source="MyTag2Visualization.xaml"

LostTagTimeout="2000"

OrientationOffsetFromTag="0"

PhysicalCenterOffsetFromTag="0,-1.5"

UsesTagOrientation="True"

TagRemovedBehavior="Fade" />

s:TagVisualizer.Definitions>

s:TagVisualizer>

Grid>

And I have two Tag Visualizations created,

MyTag1Visualization.xaml

<s:TagVisualization x:Class="MySurfaceObjectRecognizionApp.MyTag2Visualization"

xmlns="http://schemas.microsoft.com/winfx/2006/xaml/presentation"

xmlns:x="http://schemas.microsoft.com/winfx/2006/xaml"

xmlns:s="http://schemas.microsoft.com/surface/2008"

Loaded="MyTag2Visualization_Loaded">

<Grid>

<TextBlock Margin="31,62,0,0" FontSize="20" Height="26" Width="206">My Tag 1TextBlock>

Grid>

s:TagVisualization>

MyTag2Visualization.xaml

<s:TagVisualization x:Class="MySurfaceObjectRecognizionApp.MyTag2Visualization"

xmlns="http://schemas.microsoft.com/winfx/2006/xaml/presentation"

xmlns:x="http://schemas.microsoft.com/winfx/2006/xaml"

xmlns:s="http://schemas.microsoft.com/surface/2008"

Loaded="MyTag2Visualization_Loaded">

<Grid>

<TextBlock Margin="12,53,0,0" FontSize="20" Height="26" Width="206">My Tag 2TextBlock>

Grid>

s:TagVisualization>

Now it’s time to run the application and see how output is look like,

By clicking left and right mouse buttons at once, you can place objects permanently in the surface, otherwise once you release the mouse button, the virtual object will disappear. This tip is only for testing Surface applications with Input Simulator, but with real MS Surface supported devices, you don’t need to worry about this and can place objects as you expected. In real, what exactly happens is, once you put an object with pasted tag value, relevant tag visualization control content will appear on the surface, as response to the object identification.

To get this done, I didn’t write any line of code, but all the time it’s XMAL elements. You can use coding to make things smarter and useful in real application developments for MS Surface devices.

Lakmal Kankanamge.

Saturday, August 6, 2011

Unistroke Recognition in JavaScript

Recognizing shapes is one of the resource consuming works on earlier days and you need to have so complex algorithms to recognize the patterns and then identify the shape. Java Script is not having such big set of functionalities with its API, but this is a Shape Recognition Application written in Java Script.

http://depts.washington.edu/aimgroup/proj/dollar/

Microsoft Surface ScatterView

Scatter View is one of the most important controls of which Microsoft Surface SDK is providing and it enables features like multi usable, multi touchable, moving components here and there, stacking items, resizing, scaling and so on.
Throughout the discussion, we will cover,
1. How we can use Scatter View
2. Change Scatter View Properties
3. Adding Items to Scatter View Programmatically
4. Add Interactive Elements to Scatter View
5. Conclusion
Just start to get things going; let’s create a Microsoft Project in Visual Studio 2010,
Press OK and then we will get a Project created in VS 2010 named, SurfaceDemo, which is having a Surface Window named “SurfaceWindow1”. This is the XAML we got in SurfaceWindow1.XAML page,
<s:SurfaceWindow x:Class="SurfaceDemo.SurfaceWindow1"
xmlns="http://schemas.microsoft.com/winfx/2006/xaml/presentation"
xmlns:x="http://schemas.microsoft.com/winfx/2006/xaml"
xmlns:s="http://schemas.microsoft.com/surface/2008"
Title="SurfaceDemo"
>
<Grid>

Grid>
s:SurfaceWindow>

Then I will go and add a Sactter View into the Grid inside the grid,
<s:SurfaceWindow x:Class="SurfaceDemo.SurfaceWindow1"
xmlns="http://schemas.microsoft.com/winfx/2006/xaml/presentation"
xmlns:x="http://schemas.microsoft.com/winfx/2006/xaml"
xmlns:s="http://schemas.microsoft.com/surface/2008"
Title="SurfaceDemo"
>
<Grid>
<s:ScatterView Name="MyScatterView">

s:ScatterView>
Grid>
s:SurfaceWindow>

How we can User the Scatter View

No we can start adding Controls into Scatter View. You can add any of Surface Control into this Scatter view and it will give those controls to the behaviors that I mentioned earlier. Let’s start the with an Image, that the perfect example we show most of the features of Scatter View. Instead of one image we will add the set of images from one of my image folders, and we are going to add the images at the run time too.
Here is the Scatter XAML code we need for our purpose, means how it’s look like the Scatter View SurfaceWindow1.xaml file,
<s:ScatterView Name="MyScatterView">
<s:ScatterView.ItemTemplate>
<DataTemplate >
<Image Source="{Binding}"/>
DataTemplate>
s:ScatterView.ItemTemplate>
s:ScatterView>

Then in the code behind file, we have to bind the list of image into Scatter View to show them in the window,
public SurfaceWindow1()
{
InitializeComponent();

// Add handlers for window availability events
AddWindowAvailabilityHandlers();

//Add Images into Sctter View
MyScatterView. ItemsSource = System.IO.Directory.GetFiles(@"D:\WorkDir\Learnings\Microsoft Surface\Photos", "*.jpg");
}

Here what we are doing is that, just adding my mages list into scatter view item source,

Here is how output is looks like after hitting F5,


Now you can start playing with these images by using your mouse. You should be able to drag them here and there and change the angle the way you need and etc. But to test multi User and Multi Touch capabilities, you need to use the Windows 7 Input Simulator.

To Start the Input Simulator, just type input in “Run” command box, at the bottom of Windows Start Menu, then you will see the Input Simulator and just click on it.


Input Simulator


Just Click on the finger box in command window, then you will get your mouse pointer, which is most like a vertical rectangle, which is having curved edges. First Just click images with it, then you will see the reflections from the images. To play with the image, first click Left mouse button and while it is pressed, just click the right mouse button too, then you will get a fix clicked, like pined point in picture.

Then just go to other corner of the image, click left mouse button and while it is pressed start to move mouse around the window. Now you will find your ways to play with images. With this you should be able to Scale and Rotate the images easily with your mouse.

Change Scatter View Properties

When it’s come to changing properties of Scatter View items, you can,

1. Constraining Manipulations
2. Limiting manipulations
3. Setting Explicit Positions

You can constrain Scatter View Item manipulations by setting,

1. MaxHeight – this is the maximum height of items
2. MaxWidth – this the maximum width of the items
3. MinHeight - minimum height of the items
4. MinWidth – minimum with of the items
5. CanScale – true means can scale items, false means can’t scale items
6. CanRotate - true means can rotate items, false means can’t rotate items
7. CanMove - true means can move items, false means can’t move items

<s:ScatterView Name="MyScatterView">
<s:ScatterViewItem MaxHeight="100" MaxWidth="100" MinHeight="50" MinWidth="50"
CanScale="True" CanRotate="True" CanMove="False">
<Image Source="D:\WorkDir\Learnings\Microsoft Surface\Photos\Koala.jpg" />
s:ScatterViewItem>
s:ScatterView>

There are many numbers of properties; you can change in Scatter view and Scatter view items to make things more usable for your customers. Here I just mentioned few key properties only.

This is a sample Scatter View,

<s:ScatterView Name="MyScatterView">
<s:ScatterViewItem Center="512,384" BorderBrush="Brown" BorderThickness="3">
<Image Source="D:\WorkDir\Learnings\Microsoft Surface\Photos\Desert.jpg"/>
s:ScatterViewItem>
<s:ScatterViewItem Center="512,384" BorderBrush="Brown" BorderThickness="3">
<Image Source="D:\WorkDir\Learnings\Microsoft Surface\Photos\Desert.jpg"/>
s:ScatterViewItem>
<s:ScatterViewItem Center="512,384" BorderBrush="Brown" BorderThickness="3">
<Image Source="D:\WorkDir\Learnings\Microsoft Surface\Photos\Desert.jpg"/>
s:ScatterViewItem>
<s:ScatterViewItem Center="512,384" BorderBrush="Brown" BorderThickness="3">
<Image Source="D:\WorkDir\Learnings\Microsoft Surface\Photos\Desert.jpg"/>
s:ScatterViewItem>
<s:ScatterViewItem Center="512,384" BorderBrush="Brown" BorderThickness="3">
<Image Source="D:\WorkDir\Learnings\Microsoft Surface\Photos\Desert.jpg"/>
s:ScatterViewItem>

<s:ScatterViewItem Center="512,384" BorderBrush="Brown" BorderThickness="3">
<Image Source="D:\WorkDir\Learnings\Microsoft Surface\Photos\Desert.jpg"/>
s:ScatterViewItem>
s:ScatterView>

And output is like this,
You can use ItemContainerStyle property to change the properties of Scatter View Container Items,

<s:ScatterView>
<s:ScatterView.ItemContainerStyle>
<Style TargetType="{x:Type s:ScatterViewItem}">
<Setter Property="Center" Value="512,384"/>
<Setter Property="BorderBrush" Value="White"/>
<Setter Property="BorderThickness" Value="3"/>
Style>
s:ScatterView.ItemContainerStyle>
<Image Source="Desert.jpg"/>

<Image Source="Desert.jpg"/>
s:ScatterView>

Add Items to Scatter View Programmatically

Instead of doing things with Scatter View in XAML, developers can do the same, more dynamically by programming. You have access to all the properties of Scatter View, in programmatically, as you do in XAML, in statically. Whatever you do in XAML will reflect in output in static way, but whenever you need things to be more dynamic, then the option is obvious, you have to do it in programmatically.

For an Example you can take photo application I created at the first phase of the article, there we take the images from folder and populate them in Scatter View, as Scatter View Items, dynamically.

XAML
<s:ScatterView Name="MyScatterView">
<s:ScatterView.ItemTemplate>
<DataTemplate >
<Image Source="{Binding}"/>
DataTemplate>
s:ScatterView.ItemTemplate>
s:ScatterView>

public SurfaceWindow1()
{
InitializeComponent();

// Add handlers for window availability events
AddWindowAvailabilityHandlers();

//Add Images into Sctter View
MyScatterView. ItemsSource = System.IO.Directory.GetFiles(@"D:\WorkDir\Learnings\Microsoft Surface\Photos", "*.jpg");
}


Add Interactive Items to Scatter View

As WPF Panels, Grids and any other container controls, you can add any Surface Controls into Scatter View, in statically or dynamically. For an example, here we are going to add a Surface Button into Scatter View Item template,

<s:ScatterView.ItemTemplate>
<DataTemplate>
<Grid>
<Image Source="{Binding}"/>
<s:SurfaceButton Click="OnItemClicked" Content="Click Me!" Width="100" Height="80"/>
Grid>
DataTemplate>
s:ScatterView.ItemTemplate>

And it is 100% same as normal WPF controls; you can handle any number of events which could occur from these controls.

private void OnItemClicked(object sender, RoutedEventArgs e)
{
// Get the button that was clicked and hide it.
Button b = (Button)e.Source as Button;
b.Visibility = Visibility.Collapsed;

// Get the ScatterViewItem control for the clicked button.
ScatterViewItem item = (ScatterViewItem)scatter.ContainerFromElement(b);

// Get the image within the ScatterViewItemcontrol.
System.Windows.Controls.ContentPresenter content = FindContentPresenter(item);
System.Windows.Controls.Image img =
(System.Windows.Controls.Image)content.ContentTemplate.FindName("img", content);

// Convert the image to grayscale.
img.Source = new FormatConvertedBitmap(
(BitmapSource)img.Source, PixelFormats.Gray16, BitmapPalettes.Gray16, 0);
}

System.Windows.Controls.ContentPresenter FindContentPresenter(DependencyObject obj)
{
for (int i = 0; i < VisualTreeHelper.GetChildrenCount(obj); i++)
{
DependencyObject child = VisualTreeHelper.GetChild(obj, i);
if (child != null && child is System.Windows.Controls.ContentPresenter)
{
return (System.Windows.Controls.ContentPresenter)child;
}
else
{
System.Windows.Controls.ContentPresenter childOfChild =
FindContentPresenter(child);
if (childOfChild != null)
return childOfChild;
}
}
return null;
}

Conclusion

Microsoft Surface is going to be a future technology and it is still maturing. So many features we will see in future than now. This series of articles to be continued with more Microsoft Surface Programming topics and next time it’s gonna be How We can Recognize Physical Objects with Microsoft Surface Programming.

Best Regards

Lakmal